Map and navigation
All HIS screens feature a map view which is customizable via Map layers tab in task panel rightside of the map.
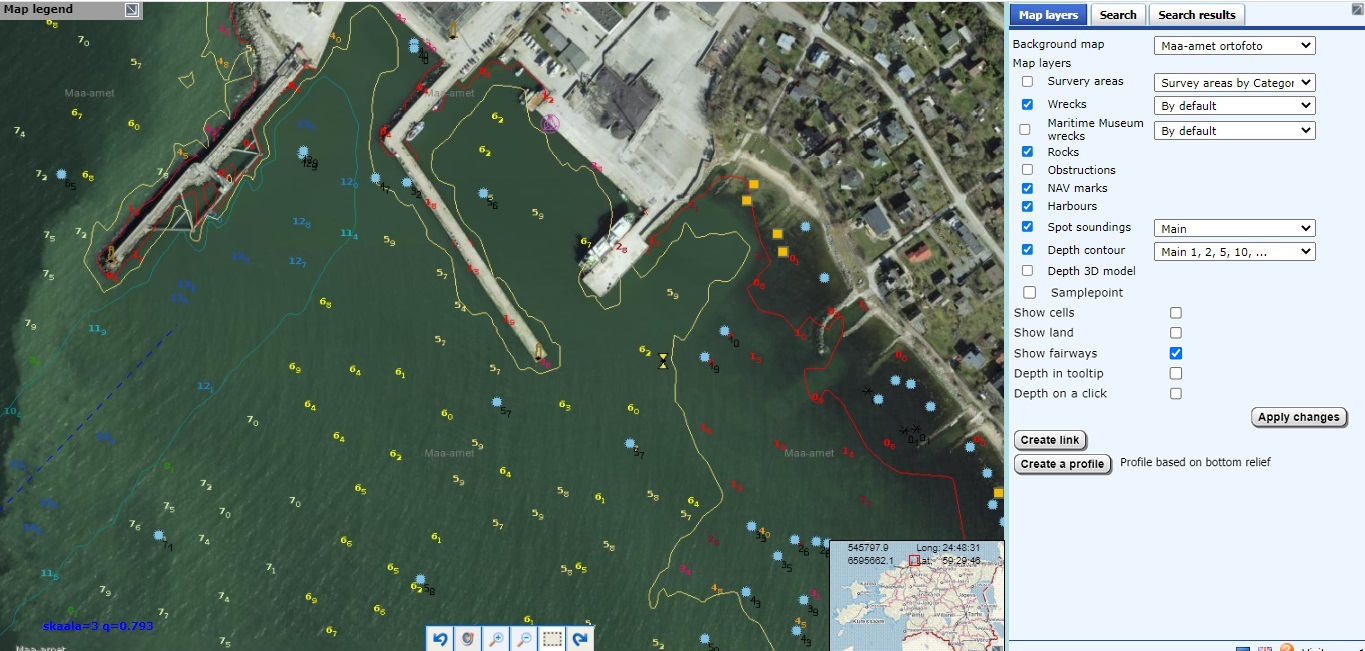
HIS map view (click to enlarge)
Navigation
There are four buttons at the bottom centre of the map which help to
navigate to desired location on the map.
The first one is
stateless but the other three remember their status (you can
toggle them on and off).
You can choose only one button/function out of the four at any time.
-
panning — you can pan the map
by "dragging" it to desired direction (click left mouse
button and without releasing it move the mouse).
NB! All navigation buttons (zoom in/zoom out/zoom to area) should be in "off" position. -
zoom to full extent —
 this button will change map to the initial view (full extent of the data).
Choosing the area to be displayed
There are three ways to zoom in and out on the map, all actions are carried out by selecting the appropriate button at the bottom of map display.
-
zoom in —
 — when this
button is in the "on" position then clicking on the map will
increase the scale (zoom in), the new centre will be in
the mouse cursor position.
— when this
button is in the "on" position then clicking on the map will
increase the scale (zoom in), the new centre will be in
the mouse cursor position.
PS Also mouse wheel can zoom in. -
zoom out —
 — when this
button is in the "on" position then clicking on the map will
decrease the scale (zoom out), the new centre will be in
the mouse cursor position.
— when this
button is in the "on" position then clicking on the map will
decrease the scale (zoom out), the new centre will be in
the mouse cursor position.
PS Also mouse wheel can zoom out. -
zoom to area —
 — when this
button is toggled "on" then you can mark a rectangular area
on the map (click the left mouse button to mark one corner,
then drag the mouse without releasing the button—you can see the
selected area as a red rectangle during the operation). After
releasing the mouse button a new central point and zoom level
is calculated for the map based on the rectangle.
— when this
button is toggled "on" then you can mark a rectangular area
on the map (click the left mouse button to mark one corner,
then drag the mouse without releasing the button—you can see the
selected area as a red rectangle during the operation). After
releasing the mouse button a new central point and zoom level
is calculated for the map based on the rectangle.
Selecting previously displayed map views
Previously displayed map views will be kept in cache and can be revisited:
-
Button
 will take you back to previous map view (move backward in
time).
will take you back to previous map view (move backward in
time).
-
Button
 will take you to the next map view (move forward in time).
Querying the map and highlighting the results
There are two ways to make spatial queries:
- From the map: when all zoom buttons (zoom in/zoom out/zoom to area) are "off" then clicking left mouse button will bring on the data window for objects under cursor.
- From menus and also from some data windows.
Query results will be highlighted on the map.
Points (wrecks, rocks, obstructions, aids to navigation, harbours)
will be highlighted with red square in
object's location.
Polygons (survey areas) will be highlighted with
red border.
Tooltips
Hovering mouse over the map opens a pop-up window (tooltip) with a list of all objects under the mouse cursor.
Data windows
Clicking the left mouse button brings up more detailed information about objects under cursor in Data window (opens in a new browser window).
Context menu
You can open the context menu by
clicking the right mouse button on map:
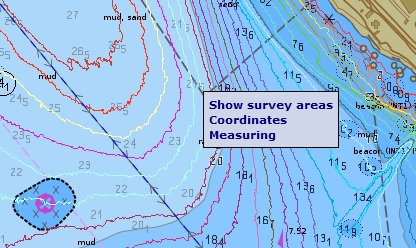
NB! Context menu does not appear in
situations where right mouse button has other functions (e.g. when
measuring distances).
Overview map
At the lower right corner of map you can see a small overview window where
the currently visible extent is displayed as a red rectangle on top of the
image
of Estonia.
It is possible to change the position of the
active view by dragging the rectangle on the overview map but zooming in
or out is not possible.
You can close and reopen the overview map by clicking to the icon at the
lower right corner of the overview window.
At the top of overview window there are shown the coordinates of the point
under cursor, as geographical (latitude/longitude : EPSG 4326) and projected
(X/Y : EPSG 3301) in L-EST97 coordinates.